Step-by-Step Guide to Deploying a 2-Tier Application with Docker

Overview: The Task Planner Application is a simple web-based application to assist users in managing their tasks efficiently. Built using Flask, a lightweight Python web framework, and MongoDB as the database, this application offers a user-friendly interface for creating, updating, and deleting tasks.
→ Key Features:
Task Management:
Users can create new tasks, update existing tasks, and delete tasks as needed.
Each task is identified by a unique ID and contains a description of the task.
RESTful API:
The application provides a set of RESTful endpoints that allow clients to interact with the task data.
Endpoints include functionalities such as retrieving all tasks, creating a new task, updating a task, and deleting a task.
Data Persistence:
MongoDB serves as the backend database, providing seamless data persistence for tasks.
Task data is stored in a MongoDB collection named “task”.
To ensure data persistence, a Docker volume named “my_volume” is mounted to the MongoDB container’s /data/db directory. This allows task data to be stored persistently, even if the container fails or is terminated.
Containerization:
The application is containerized using Docker, allowing for easy deployment and scalability across different environments.
The Dockerfile specifies the necessary steps to build the application image, including copying the source code, installing dependencies, and exposing the application port.
→ Components:
Flask Application:
The Flask application is the core component responsible for handling HTTP requests, processing data, and generating responses.
It utilizes the Flask-PyMongo extension to establish a connection with the MongoDB database and perform database operations.
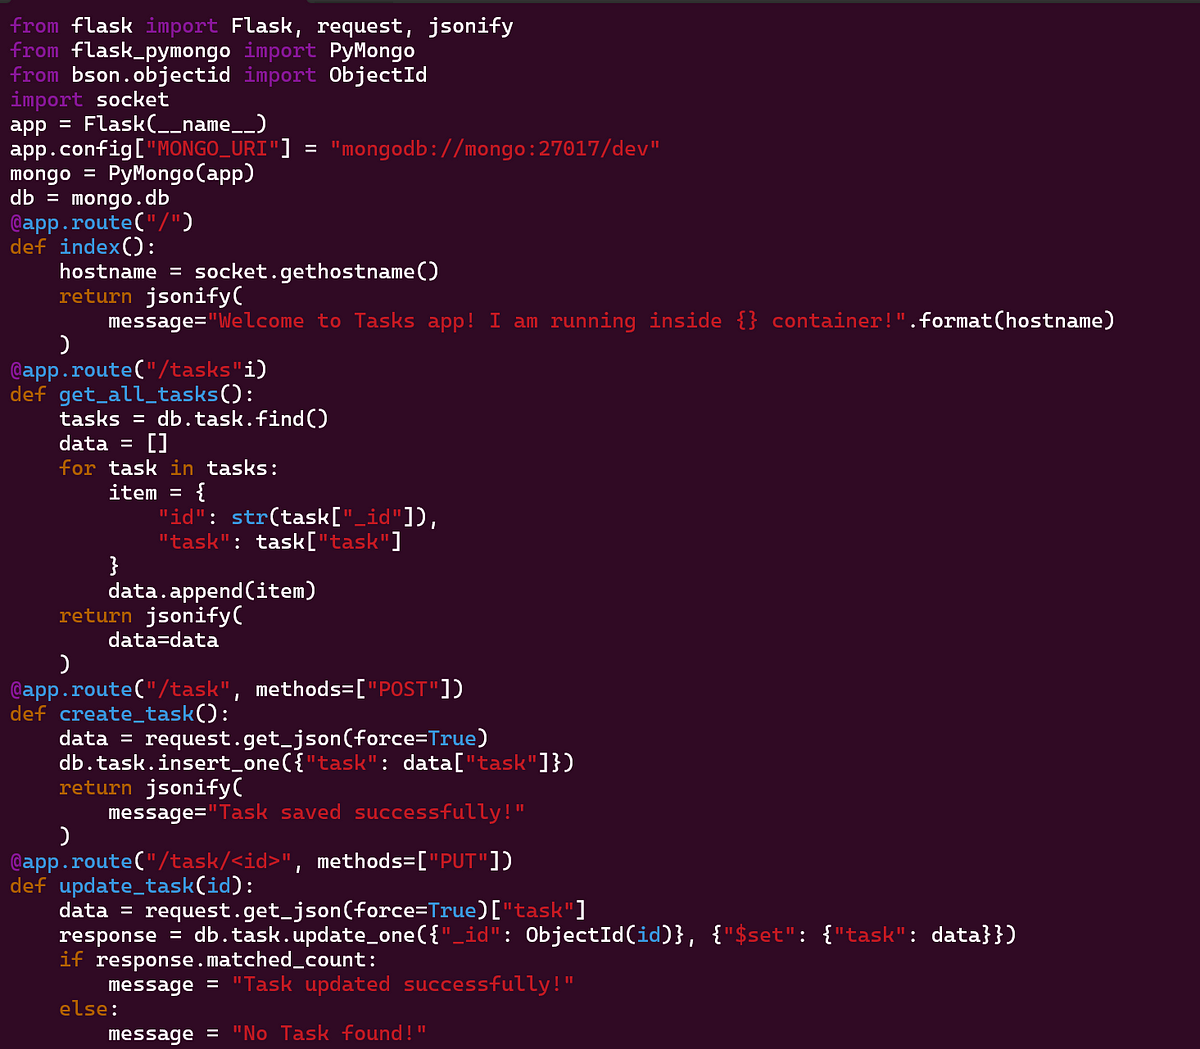
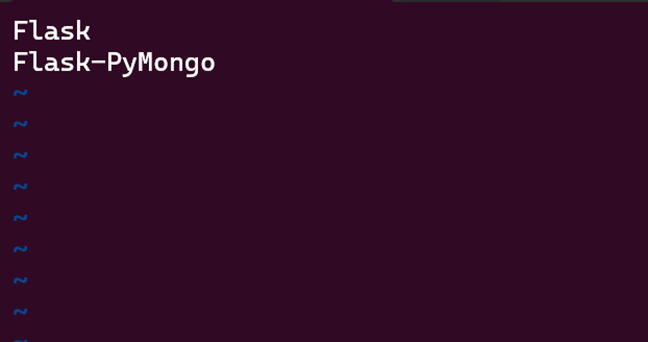
requirements.txt
MongoDB Database:
MongoDB serves as the backend database for storing task data.
The MongoDB URI specified in the Flask application’s configuration (mongodb://mongo:27017/dev) ensures connectivity to the MongoDB database running on the “mongo” container within the custom bridge network.
Docker Container:
The application is packaged into a Docker container, providing encapsulation and portability.
The Dockerfile defines the environment setup and dependencies required to run the application, facilitating consistent deployment across different environments.
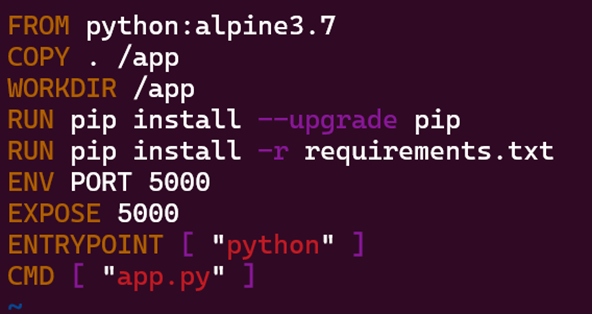
Dockerfile
→ Deployment:
· Creating a Custom Bridge Network

Docker Network: my-network
- To deploy the Task Planner Application, simply build the Docker image using the provided Dockerfile and run the containers on my-network bridge network.
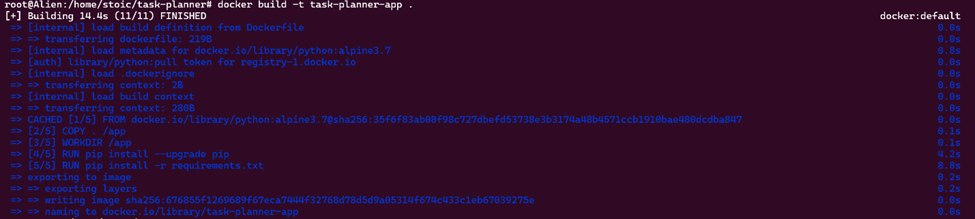
docker image task-planner-app
Creating a container named task-planner

docker container: task-planner-app
Creating a container named mongo
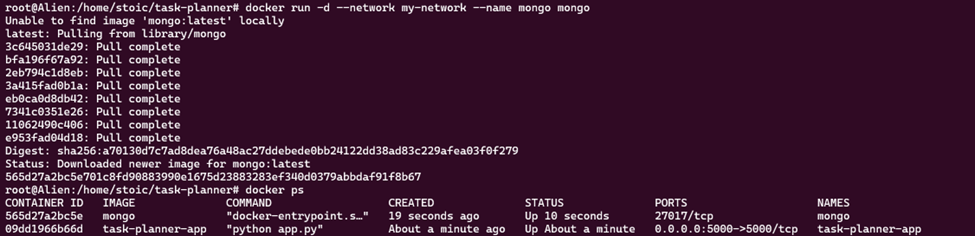
docker container: mongo
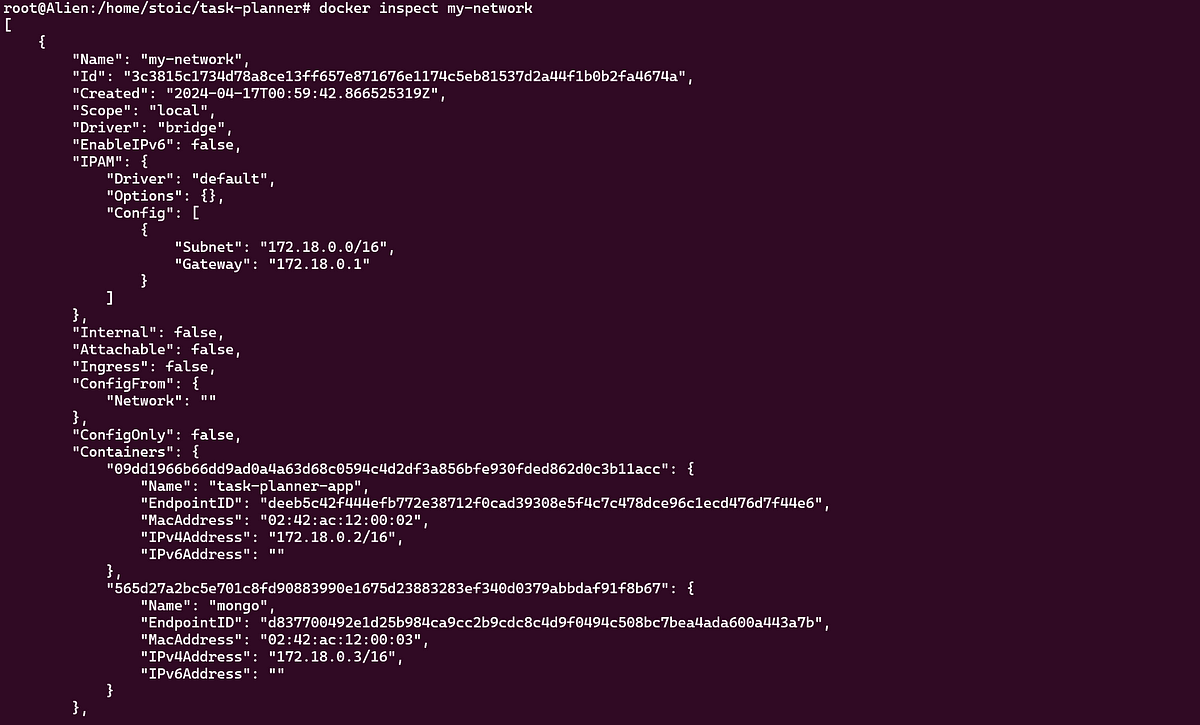
docker inspect my-network
Initiating a shell session to interact with a MongoDB instance. “mongosh” assumes that MongoDB is running and accessible at the specified host and port.
- The application listens on port 5000 by default and can be accessed through the specified host IP address or domain.
→ <host IP>:5000/tasks
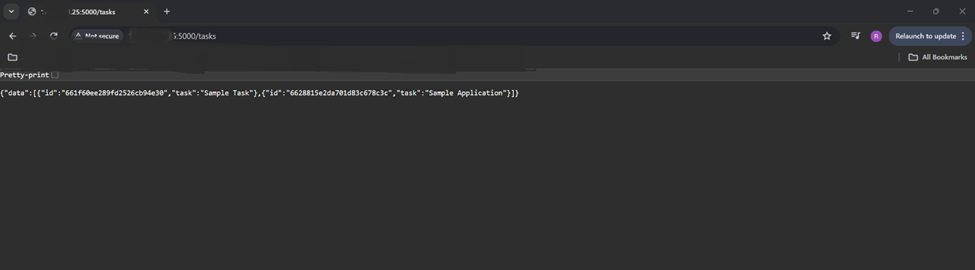
Accessing the application through browser
- Once deployed, users can interact with the application via the provided RESTful API endpoints or through the web interface (Postman).
→ Using the RESTful API Endpoints:
· Users can send HTTP requests directly to your deployed Flask application’s API endpoints. These endpoints handle various operations like creating, updating, deleting, and retrieving tasks.

using curl
· For example, users can send GET requests to retrieve all tasks (/tasks endpoint), POST requests to create a new task (/task endpoint), PUT requests to update a task (/task/<id> endpoint), and DELETE requests to delete a task (/task/<id> endpoint).
→ Using Postman (Web Interface):
· Users who prefer a graphical interface for interacting with APIs can use tools like Postman.
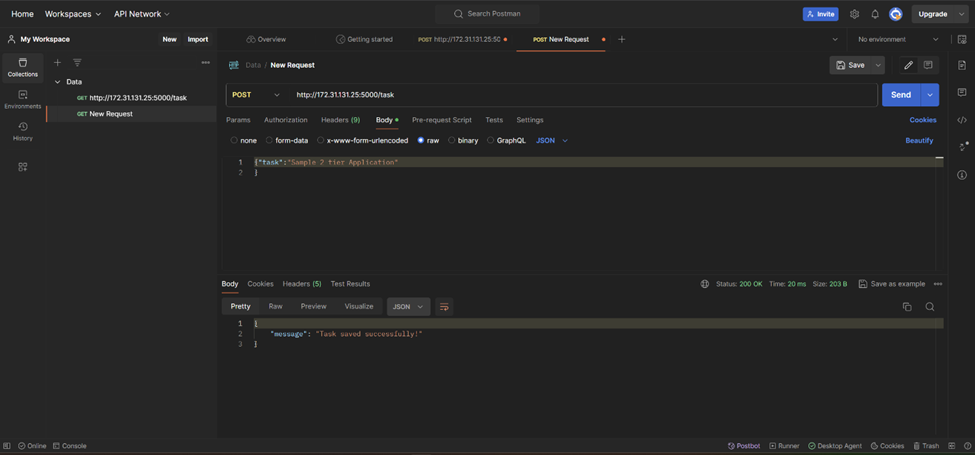
· They can create requests in Postman, specifying the HTTP method, URL of the Flask application’s API endpoint, and any required request body parameters.
· Postman provides a user-friendly interface for composing requests, inspecting responses, and managing collections of requests.
· Users can send requests from Postman to interact with your Flask application’s API just as they would with CURL or any other HTTP client.
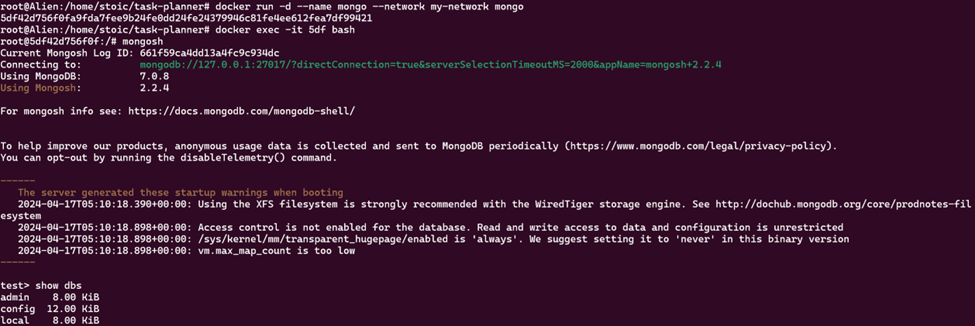
· To see the list of tasks you can use curl, Postman or you can go inside the container using docker exec command and see the list of tasks.

docker exce -it <container id> bash
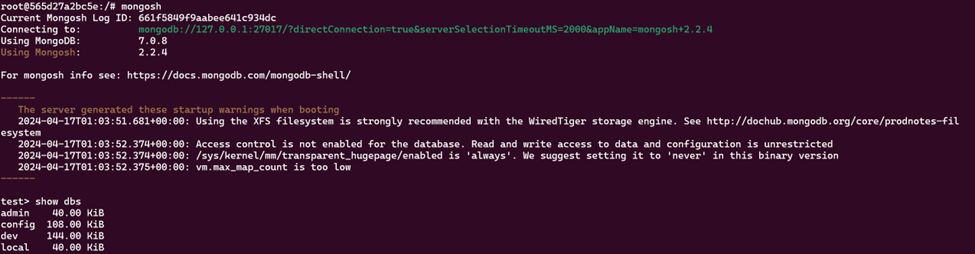
mongosh
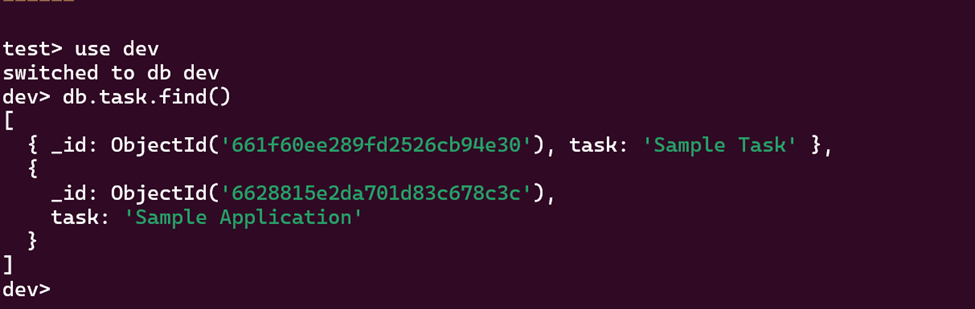
List of tasks
· To persist the data even after container is terminated or failed due to some reason, we will mount a volume called my_volume: docker volume create my_volume
· To check the list of volume: docker volume ls
· To attach the volume to already created container “mongo”, you need to do following:
→ Remove/kill the container: docker rm -f mongo
→ Now, run the container with “my_volume” attached: docker run -d — name mongo -v my_volume:/data/db mongo
· So even if you delete the container, you will be having your data persisted.
By following the step-by-step instructions provided in the article, users will be able to deploy the Task Planner Application on Docker, interact with it using RESTful API endpoints, and access the web interface through tools like Postman. Additionally, they’ll learn how to ensure data persistence using Docker volumes, allowing data to be retained even if containers are terminated or fail.
Happy Learning!!
Thank you
Github: https://github.com/RuchikaPatel/Task-Planner/tree/main


