AWS CodeCommit: Hands-On AWS Lab

Ø What is AWS CodeCommit?
AWS CodeCommit is a secure, highly scalable, managed source control service that hosts private Git repositories.
Ø Why to use AWS CodeCommit?
· AWS CodeCommit stores your data in Amazon S3 and Amazon DynamoDB giving your repositories high scalability, availability, and durability.
· You simply create a repository to store your code.
· There is no hardware to provision and scale or software to install, configure, and operate.
· AWS CodeCommit helps you collaborate on code with teammates via pull requests, branching, and merging.
· AWS CodeCommit ensures high security by automatically encrypting your files both in transit and at rest. It is seamlessly integrated with Amazon Identity and Access Management (IAM), enabling you to customize user-specific access to your repositories.
Ø What you will learn through this lab?
· How to create a code repository using AWS CodeCommit via the Amazon Management Console
· How to create a local code repository on the Linux instance using git
· How to synchronize a local repository with an AWS CodeCommit repository
Ø Task 1: Creating a user on your root account
· In this task, you use the AWS Management Console to create a user. At the top of the AWS Management Console, in the search bar, search for and choose Users
· Click on Create user

· Enter the user’s name: Here I have entered “Rachel”
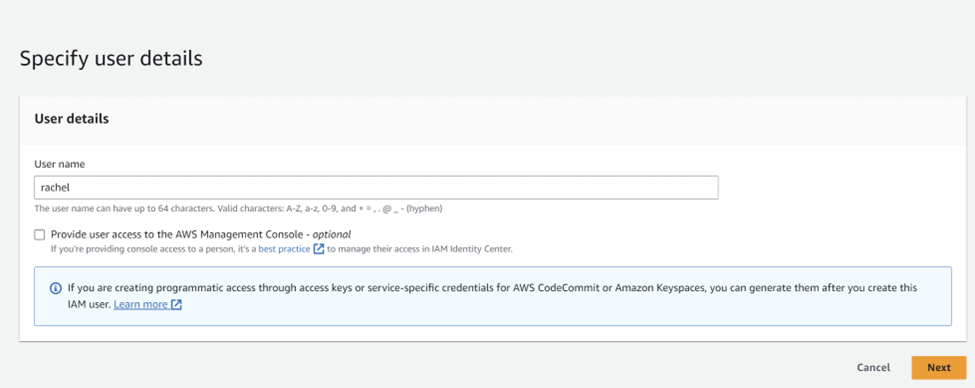
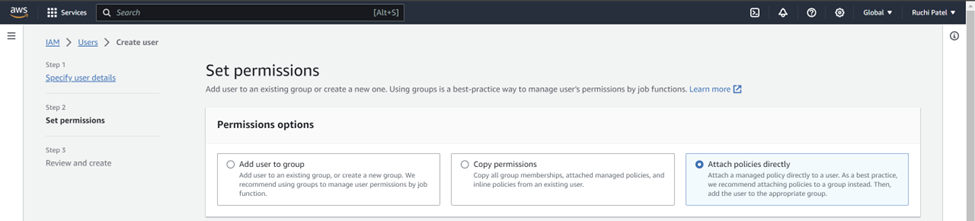
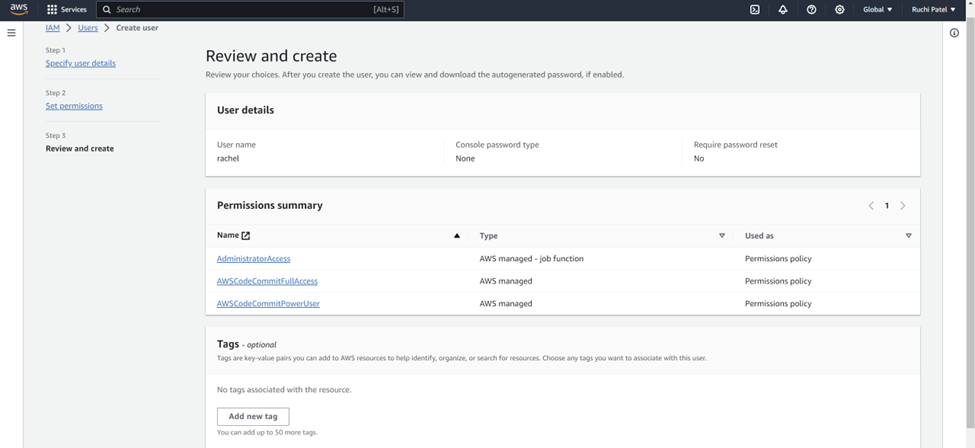
· Next add the permissions, so either you can attach the permissions directly like I did or you can create a group and add the necessary permissions in it and you can directly assign the user to the group (this is the recommended approach) and then click on create user.
· Once the user is created click on the user, click on Security credentials

· Generate a user name and password you can use to authenticate HTTPS connections to AWS CodeCommit repositories.
Scroll to HTTPS Git credentials for AWS CodeCommit and click on Generate credentials. It will generate the username and password. Download the credentials and close.

Ø Task 2: Create an AWS CodeCommit repository
· Perform this task on your IAM account not on your root account. (So, if you have not created a user create the user and then perform the following task)
· In this task, you use the AWS Management Console to create an AWS CodeCommit repository. At the top of the AWS Management Console, in the search bar, search for and choose CodeCommit
· On the AWS CodeCommit page, choose Create repository.
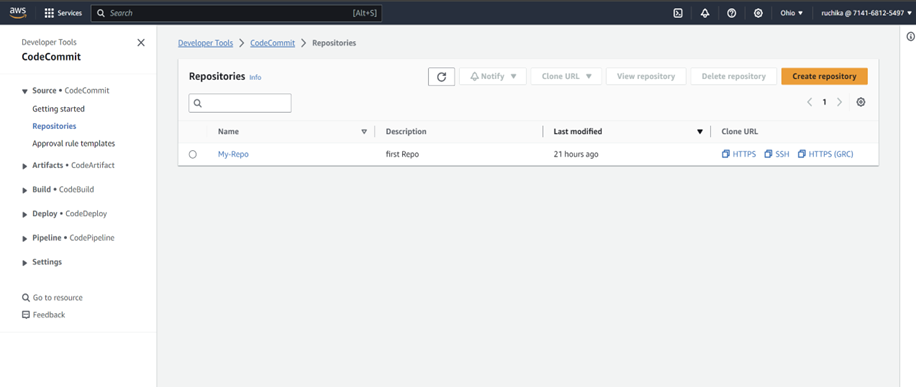
· For Repository name, enter: My-Repo and For Description enter: My first repository

· Choose Create: An empty repository named My-Repo is created. You should now be on the My-Repo page, which contains the details to connect to the repository.
Ø Task 3: Connect to the Amazon EC2 instance
· Perform this task on your IAM account not on your root account.
· Create an Amazon EC2 instance.
· At the top of the AWS Management Console, in the search bar, search for and choose EC2 then select Instances and then Launch Instance

· Select Instance Type as t2.micro
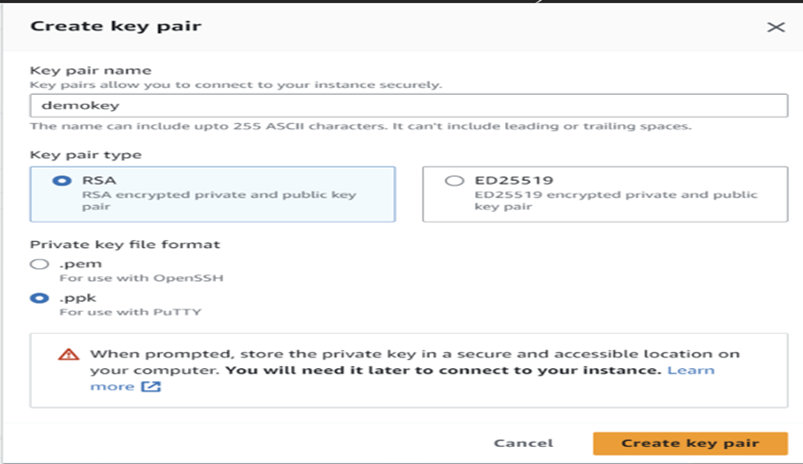
· Create a key pair, select on create new key pair (Make sure you select. ppk as we are using PuTTY to connect to our EC2 Instance)
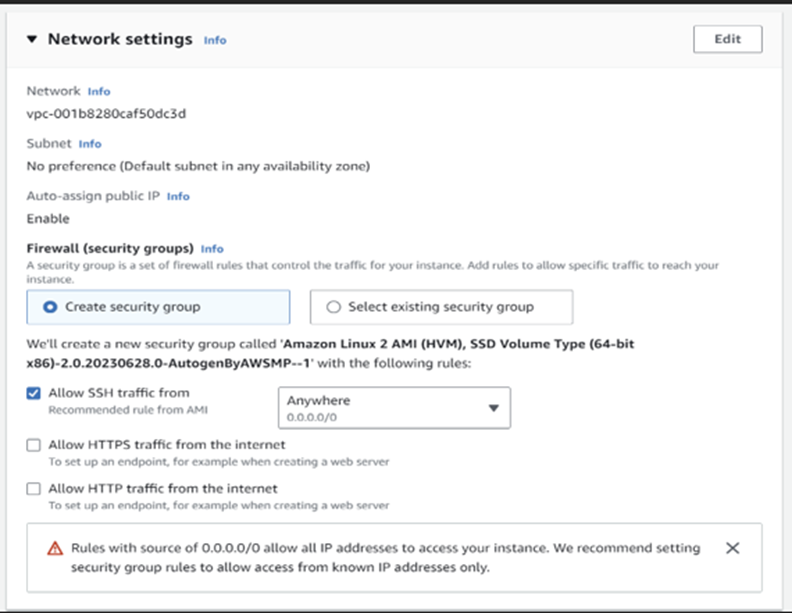
· Create a Security Group
· Other configuration can remain on it’s default setting, no need to change as of now. And lastly, click on button that says Launch Instance
Ø Task 4: Create a local repository using Git
· This task provides an example of how you would use AWS CodeCommit to synchronize to any local code repository that you might create in your normal production development environment.
· First connect to EC2 Instance using PuTTY
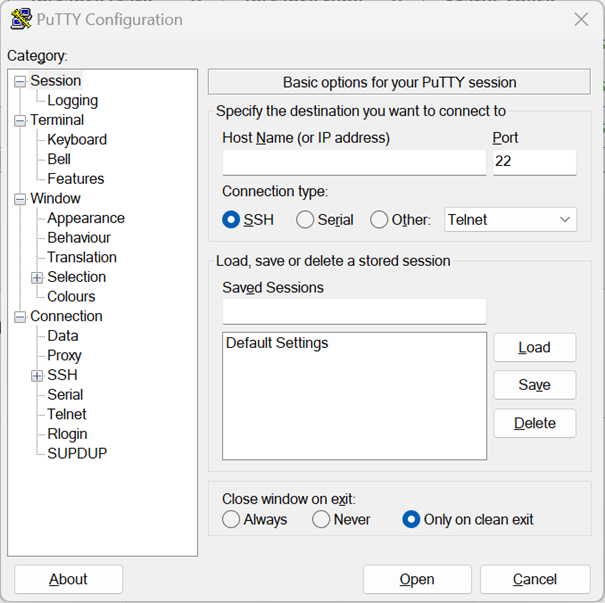
· Go to SSH → Auth → Credentials
Select/Browse private key for authentication i.e., your .ppk key that we created while creating EC2 instance.

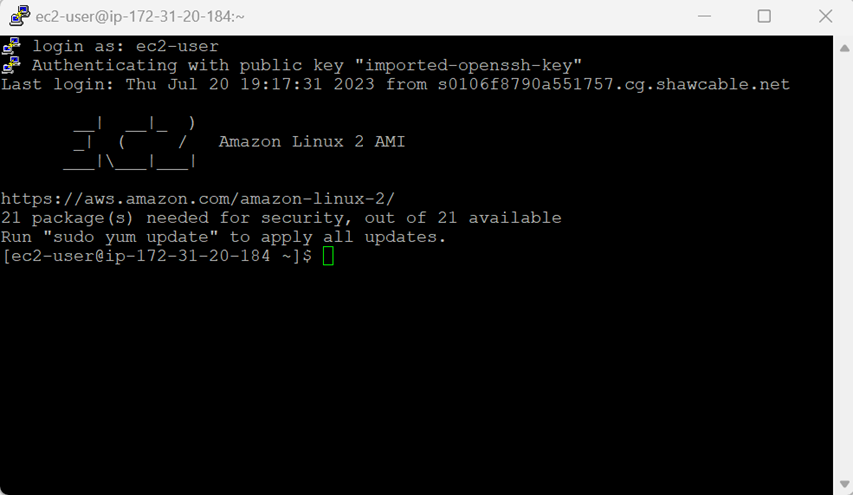
· Press Open button and then it will ask for login as, where you will enter ec2-user. So you are logged in as ec2-user.
· Now Install git: sudo yum install -y git
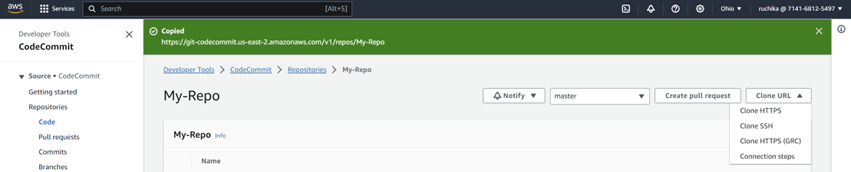
· Next, obtain the HTTPS URL of your AWS CodeCommit repository. Return to your web browser tab with the AWS CodeCommit console, which should be on the My-Repo page. At the upper-right of the page, choose Clone URL , and then choose Clone HTTPS.
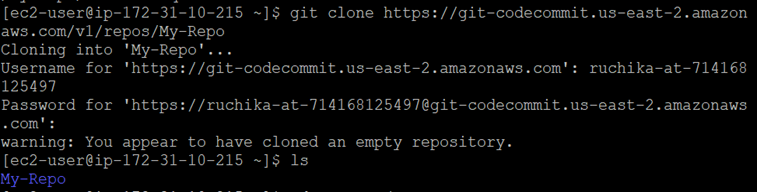
· On your EC2 terminal write the following command: git clone <the https url> (The repository URL is copied to your clipboard and should look similar to this: https://git-codecommit.us-east-2.amazonaws.com/v1/repos/My-Repo)) and in case if you get 403 error make sure that you have added necessary permissions and entering the right credentials (Task 1). On Success, empty repo is created.
· Making a code change and first commit to the repo Run the following command to change to the My-Repo directory: cd ~/My-Repo
· Run the following command to create two files in your local repo:
echo “Hello!! I am earth” > earth.txt
echo “Heya!! I am Jupiter ” > jupiter.txt

· Run the following command to list the files in the current directory: ls
The output should show the two files you created, similar to this: earth.txt jupiter.txt
· Run the following command to stage the changes in your local repo:
git add earth.txt jupiter.txt
· Run the following command to view the status of your repo: git status
The output should show the branch you are current working in (master) and that the two files are ready to be committed to the repository
· Run the following command to commit the changes in your local repo:
git commit -m “Added earth.txt and jupiter.txt”
· The output displays a message stating that the name and email address of the committer were configured automatically. In a production environment, you would use the commands listed to set your name and email address, which are then applied to each commit you do. The output also shows that two files were changed and inserted.
· Run the following command to view details about the commit you just made: git log
Ø Task 5: Push your first commit
· Run the following command to push your commit through the default remote name Git uses for your AWS CodeCommit repository (origin), from the default branch in your local repo (master): git push -u origin master
· After you have pushed code to your AWS CodeCommit repository, you can view the contents using the AWS CodeCommit console. Return to your web browser tab with the AWS CodeCommit console, which should be on the My-Repo page.
· refresh the page. The two files that you added to your repository should be displayed. Choose the link for each file to view its contents.
Congratulations! You have successfully pushed the changes from your local repository to the remote CodeCommit repository.
I appreciate your time and attention. If you found this article helpful, please consider sharing it with others who might benefit.”
Special thanks to AWS Skill Builder Labs https://training.resources.awscloud.com/modern-apps-traincert/elevate-your-devops-skills-with-3-free-aws-builder-labs


